

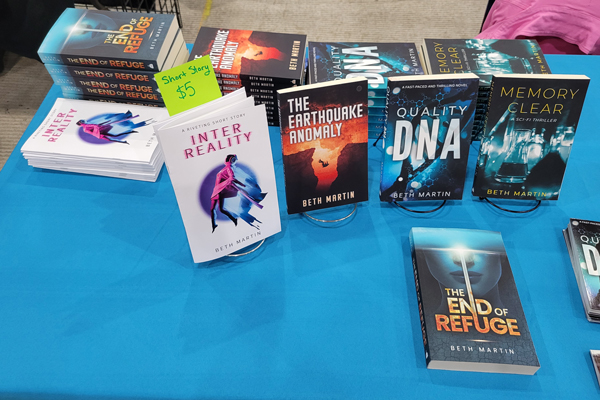
I enjoy setting up a table at conventions and events to meet other pop culture and sci-fi nerds like myself and sell copies of my books to potential fans. I decided to try an experiment recently and offer something smaller and cheaper than a full-length novel which would still give readers a taste of my style. Short stories are a natural vehicle for this, so I made an affordable and easy-to-print version of my newest short story “Inter Reality” to sell.
Since this was such a fun endeavor, I thought I’d put together a bit of a tutorial to allow other writers to do the same thing! These booklets are also a great way to start selling your work before you’re ready to release a full-length novel.
Before embarking on this endeavor, make sure you have access to all the materials needed. Although most writers already have a computer and a printer, you’ll also need LOTS of paper, staples, and a special stapler. To make these short-story booklets, you will need the following:
- Computer and word processing software to write and format your short story.
- Duplex printer.
- Paper for both the short story body and the cover.
- Long-arm stapler to staple the spine of your booklet. A regular stapler won’t work for this project because it won’t reach the center of the booklet.
- A design program like Canva or Photoshop to create your design.
Write a Short Story
The first step, of course, is to have a short story you’d like to try printing to sell. Some writers already have several short stories under their belts, while some—like myself—find keeping their prose on the shorter side to be a particular challenge.
Whether you already have a story ready for this purpose or choose to write something fresh, there are a few steps every writer should take before selling their work. First, have others critically read your story and provide feedback on any plot holes, changes required, or errors in general. Every writer should join a writing/critique group, but you can also find people online and through social media willing to help.
Once you’ve incorporated the feedback into your story, I recommend having a professional editor review it. Most editors charge per word, so getting a short story professionally edited won’t break the bank.
Since you’ll be printing this story, you will want to keep the word count in mind. I recommend staying under 15,000 words so the text can be comfortably printed on ten sheets of paper or fewer. More than that and the booklet may not stay nicely folded and will be too difficult to staple together. For reference, “Inter Reality” is 6,000 words and printed on four sheets of paper.
Format the Story for Print
Once your story is polished and ready to be read, it will need to be formatted to print into a booklet. I use InDesign, however, even a simple word processor can handle putting together the pages. Feel free to format your story using Microsoft Word, Apple Pages, or even Google Docs.
Although there are a variety of trim sizes for print-on-demand books, we want to print these short story booklets at home. In order to skip the step of cutting the paper to size, I used half-letter-sized pages. Once printed, the sheets will get the folder together; no cutting will be necessary.
Start by setting up your document to half-letter pages. You can use the same-sized margins on all sides but consider using larger top margins if you want to add a header and/or larger bottom margins if you’re adding page numbers to the bottom of the page.
I didn’t add any front or back matter to my booklet to keep the page count down. The story starts at the top of the first page. I did add my short bio and a copyright disclosure at the end of the story, right after the end of the text, so they didn’t need their own page.
Instead of getting into the weeds of formatting details, I put together a template you can use for your short story booklet. You can find it here.
Once you’re done formatting, you’ll want to export your document into a PDF file. Make sure the finished pages are the correct size at 5.5” x 8.5”.
Make a Cover
I’ve had lots of thoughts on covers over the years, but I’m keeping things simple for this tutorial.
I don’t have a printer that can print the edge of the page, so I put together a cover with this limitation in mind. Since I can print in color, I used a good amount of color in my booklet cover. If you only have black and white printing, you could print the cover on colorful paper to make it stand out.
You’ll want to lay out your cover on a landscape sheet of paper. Since it will be folded around the booklet, the lefthand side will be the back cover, and the right will be the front.
All the front cover needs are the story title, an eye-catching graphic, and your pen name. You can leave the back cover blank or include information like a story description, author bio, website/social media handle, and/or copyright information. Since you aren’t selling these through a retailer, you won’t need an ISBN or barcode.
Although you can use a workhorse like Photoshop for the cover, something like Canva will also do a great job with the cover. You can even use this Canva Template I created as a starting point.
Here’s the cover I made for “Inter Reality” to give you an idea of how I set up my cover.

Print the Booklet
Now for the fun part: printing! I printed the body of my booklets and the covers separately. You’ll want to print one test booklet before printing a bunch of them at once.
I use Bookbinders’ Collator to print booklets and highly recommend you use it as well. Printing the pages in the correct order for binding can get challenging, and this app takes all the guesswork out of it.
Using the Bookbinders’ Collator app, open the PDF for the body of your booklet.

You’ll want to use the settings “Preserve size,” “US Letter,” and “Folio.” To calculate the number of sheets per signature you should use, divide the number of pages in the PDF by four and round up if there’s a decimal. Since “Inter Reality” is sixteen pages, I used four sheets per signature.
For another example, if you’re PDF is 33 pages, take 33 divided by 4 which is 8.25, then round up to get 9 sheets per signature.
Choose two-sided printing and specify flipping on the short-side or short-side binding.
Since I printed the cover separately, I printed it straight from the graphics program I used to create it. Also, I opted for a slightly heavier paper weight just for the covers to make the booklets more sturdy. However, standard copy paper will work just fine.
Once you have the body and cover printed, you’ll want to stack them in the correct order and then staple the spine.

I use a long-arm stapler and highly recommend one if you print more than one booklet. It’s best to staple from the cover to the inside of the book so the staples don’t snag on anything once the booklet is folded.
Once you’ve stapled and folded your booklet, you’re done! I took an extra step and added weight on top of the finished stack of booklets overnight so they’d stay nice and flat.
Sell Your Stories
Once you have your stack of booklets, you’re ready to bring them to your next event! I personally sold my short stories for $5 and thought this was a reasonable price. They didn't sell nearly as well as my full-length works, but they were fun to put together and I might include them in some giveaways as well in the future.
No comments:
Post a Comment